


Preparing a Halloween Model for Printing
Like many of you, I enjoy finding cool organic models on Thingiverse to make on the 3D Printer. I'm reasonably skilled in mechanical modeling, but have no talent for producing artistic / organic shapes.
This weekend, I went searching for some fun Halloween prints. This model by BurulaNikita was one that caught my eye.
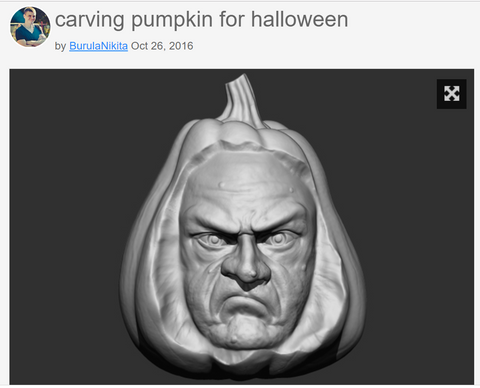
When I design or select an object for 3D Printing, there are a few things I look for. I hate printing support and I hate printing excessive infill for the sake of support. Looking at this model, it doesn't have a flat bottom or any flat surfaces, so it would definitely require supports. Further, the nose, chin, and eyebrows all appear to need some support.
However, if you flip the model upside down and cut off the top, it can mostly be printed with no support. Due to the saddle points on the bottom, infill would still be required even if the printer did some tremendous bridging.
So, I decided to split it into three using the cutting tool in Netfabb as shown:

I then printed the top right side up, and both the middle and bottom upside down.
Slicing was done in Ultmaker Cura 3.4.1.
It was printed on the Ultimaker 2+ with 0.6mm E3D nozzle using our orange Printed Solid Daily PLA.
The bottom was printed with 3 shells, infill where needed for support, and .25mm layer height. No supports or adhesion aid.
Top was printed with 3 shells, infill where needed for support, .20mm layer height with adaptive layer height of .05mm. No supports or adhesion aid.
The center portion was printed upside down, no supports, no top or bottom layers, 2 shells, .12mm layer height with adaptive layer height of 0.04mm. No adhesion aid.
The results turned out pretty awesome. If you'd like to give it a try yourself, I've posted the remix on Thingiverse here.


Products featured in this blog: